
Integraion
TABLE OF CONTENTS
1. Create a landing page with messaging you want people to see when they unsubscribe
3. Replace the default unsubscribe link url with the Trigger Link
5. Now you can integrate the trigger link as the unsubscribe link in the email footer
1. Create a landing page with messaging you want people to see when they unsubscribe
2. Use the url to the landing page from Step 1 to make a Trigger Link. Learn more about Domain Setup (Funnels & Websites)
3. Replace the default unsubscribe link url with the Trigger Link
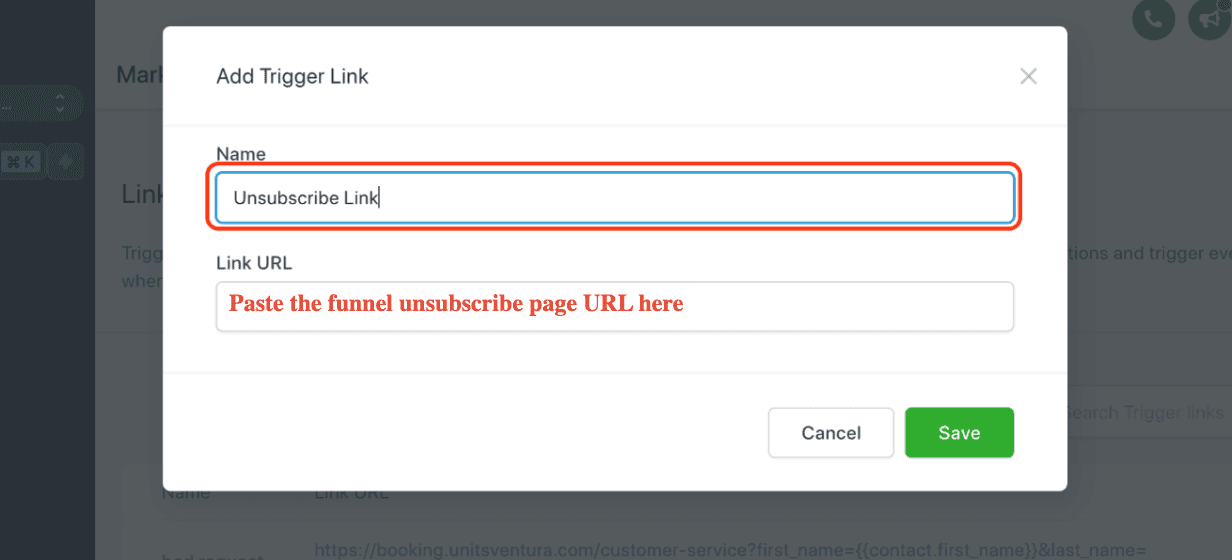
Click on 1. Marketing > 2. Trigger links > 3. Add Link
Click Save once you put:
Name: Unsubscribe Link
Link URL: Paste the funnel unsubscribe page URL here
4. Create a workflow that uses "Trigger Link Clicked" as the condition and "Set Contact DND" as the action
Click on 1. Automation > 2. Create workflow
Click on 1. Start from scratch > 2. Create new workflow
1. Update the workflow title to Trigger Link Unsubscribe
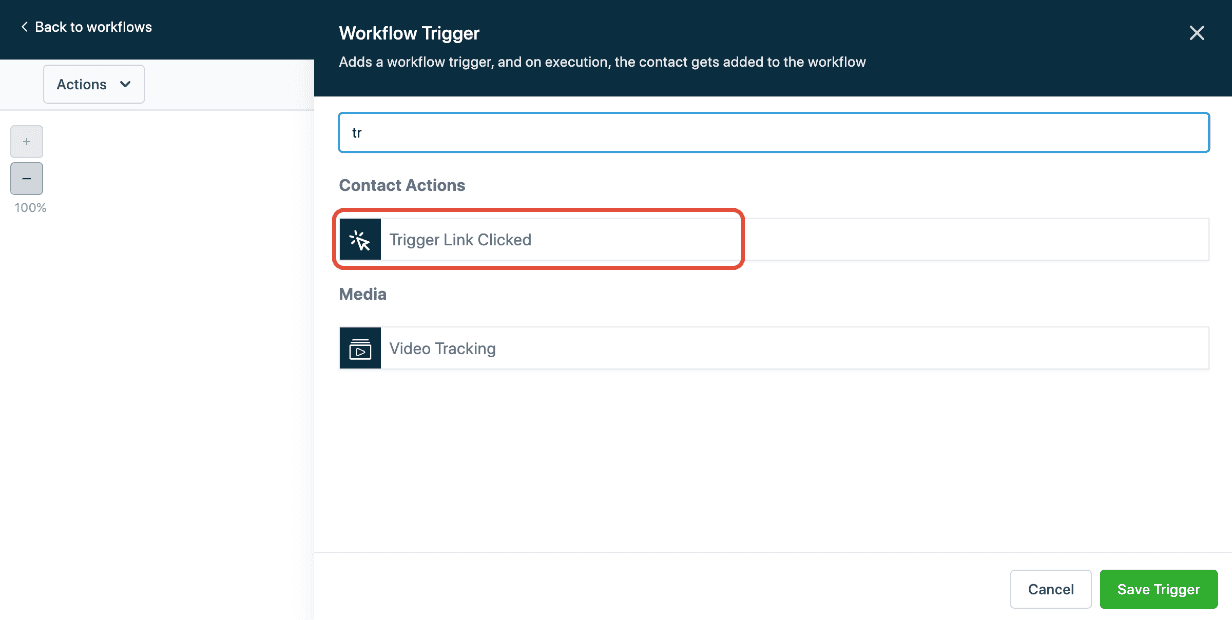
2. Click on Add New Workflow Trigger

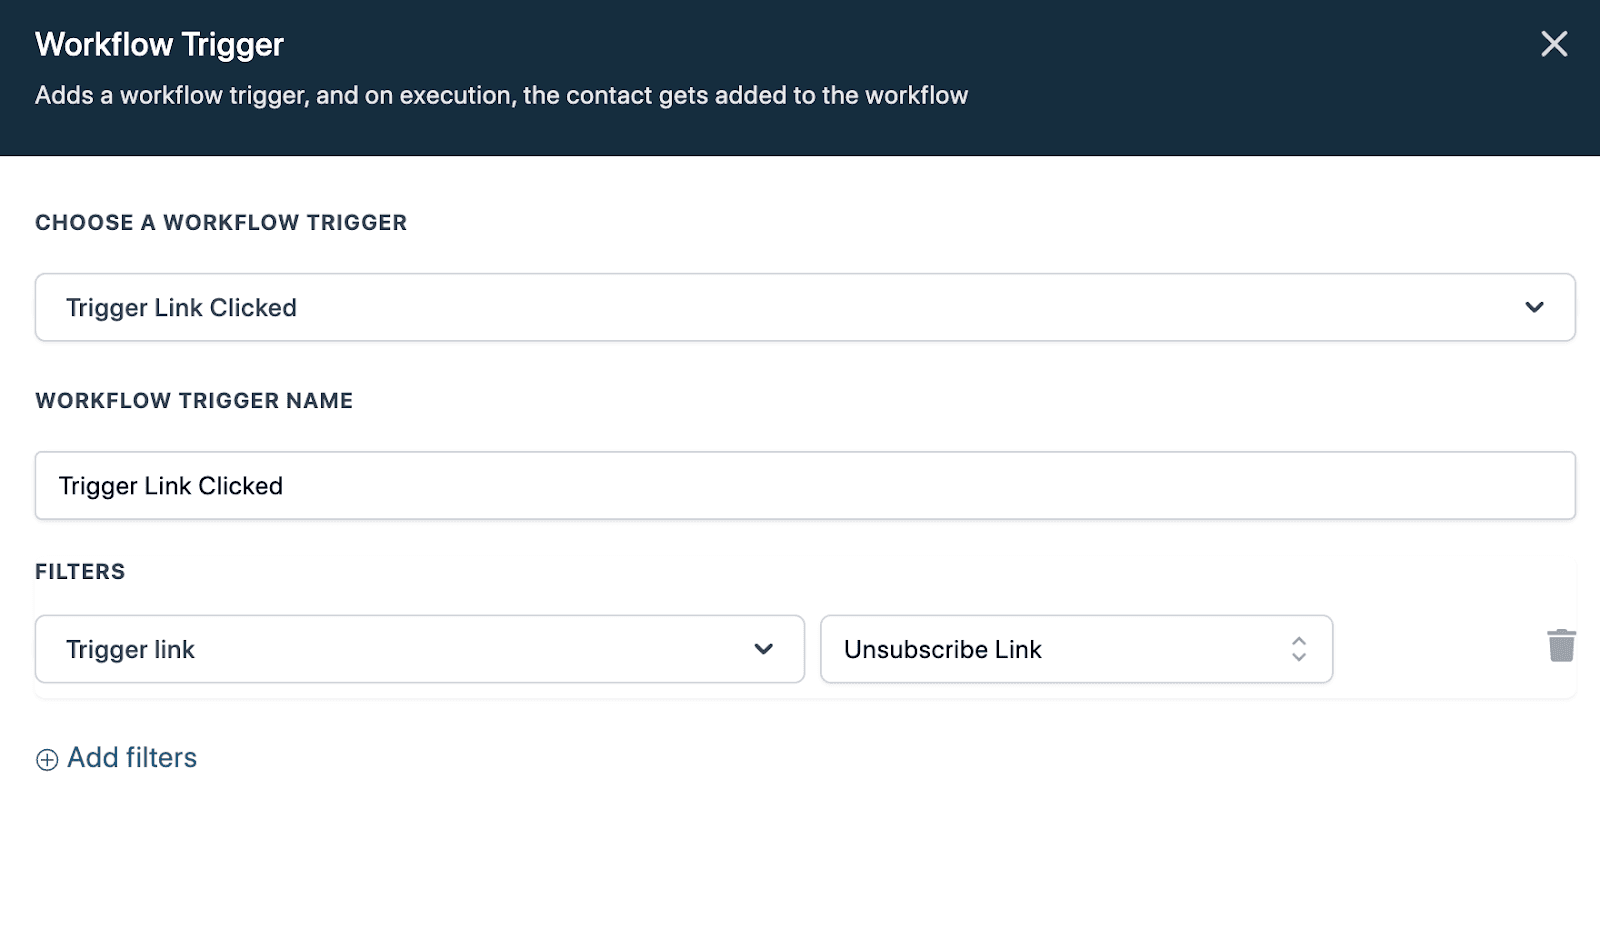
Search for the Trigger Link Clicked workflow trigger
Click on Add filters
Filters
Trigger Link: Select Unsubscrbe link
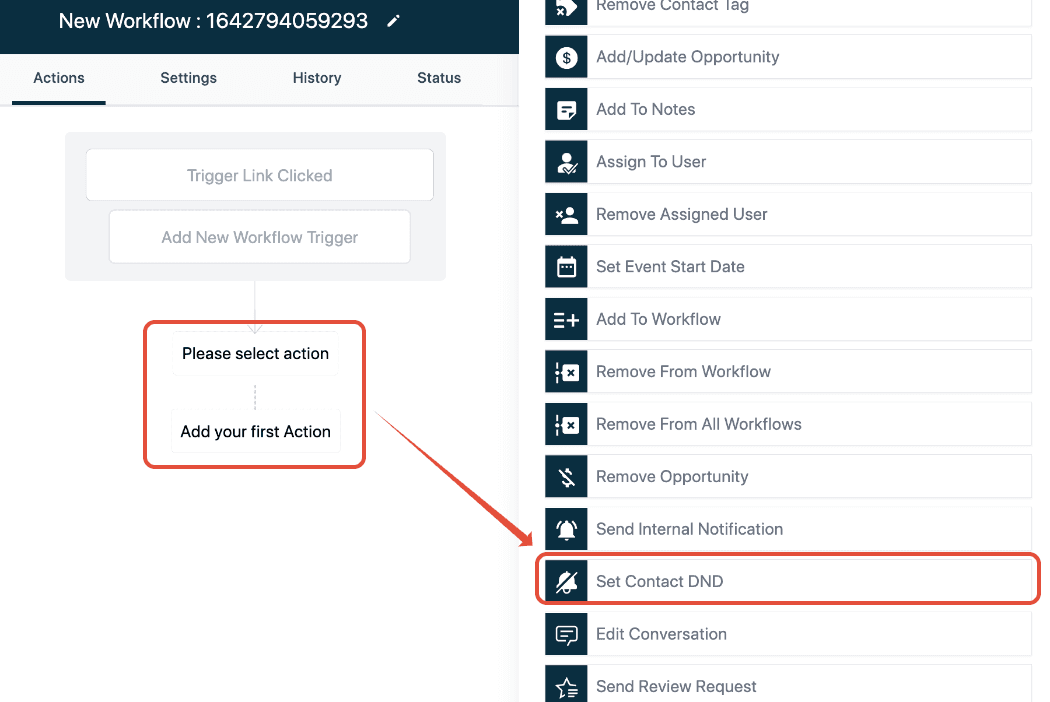
Now we can add our first workflow action
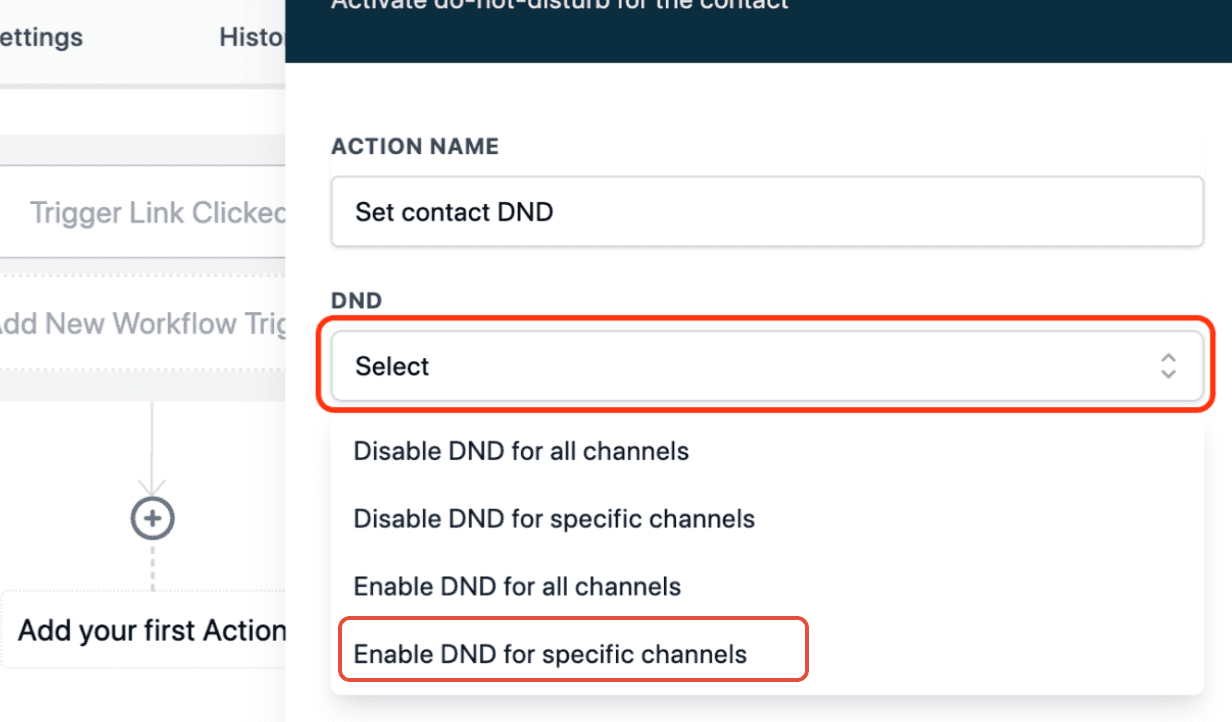
Look up the action to Set contact DND
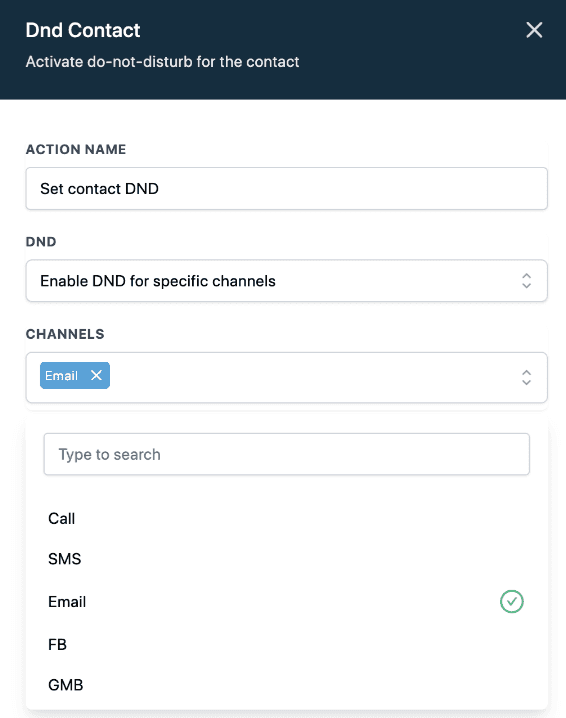
In the dropdown, choose Enable DND for specific channels:
Select Email as the Channels
Click Save Actions
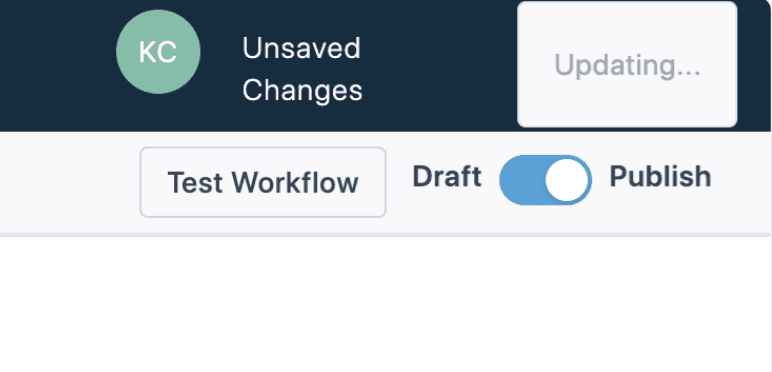
Save and publish workflow!
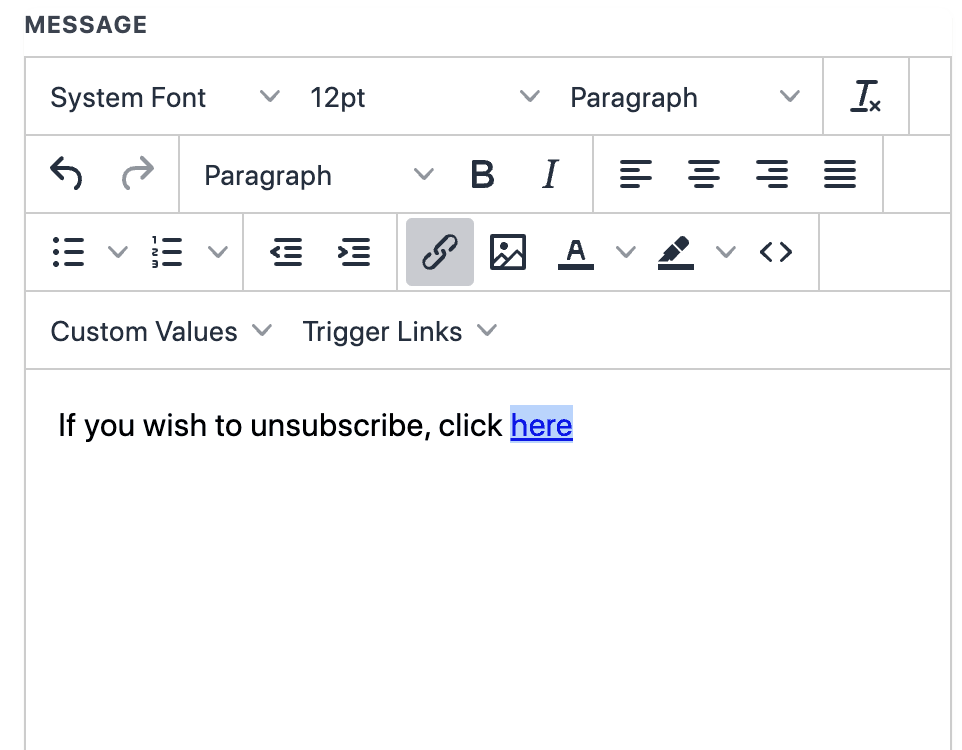
5. Now you can integrate the trigger link as the unsubscribe link in the email footer
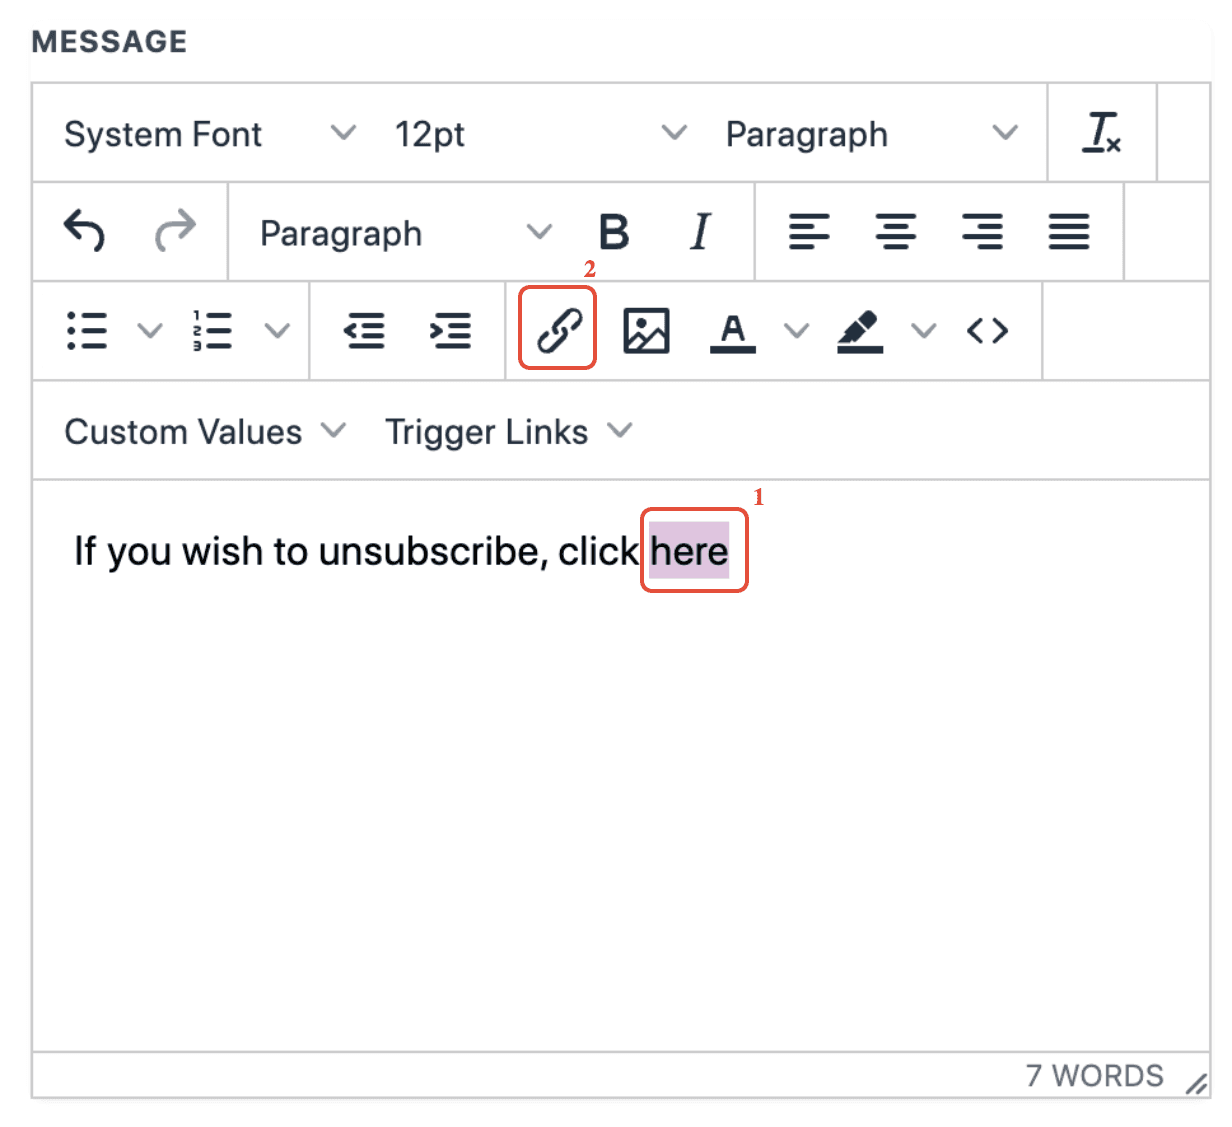
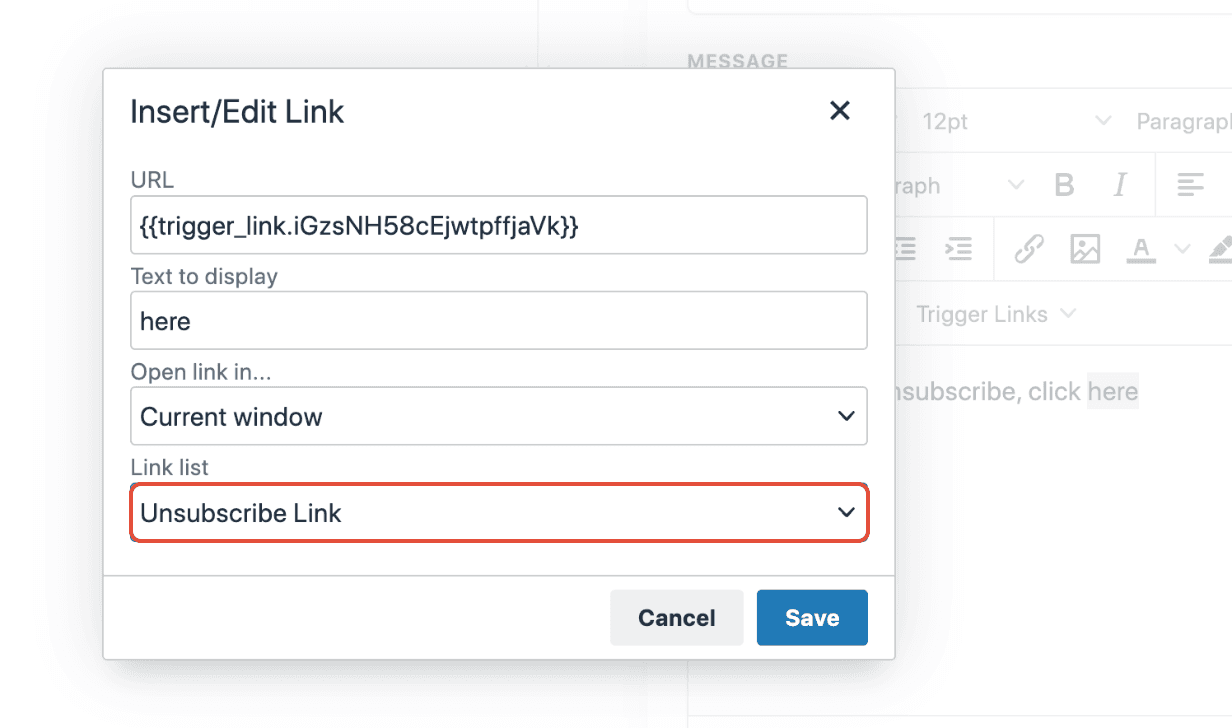
1. highlight here
2. Click on the link icon
Select Unsubscribe Link from Link list
Click Save
Now anyone who click on the trigger link here will be marked DND for the email channel!
© Copyright 2023. All rights reserved.